Feeler gauges are a mechanical instrument for measuring the width of narrow gaps. These gauges have a sizing system and come in many different types, which is a common source of confusion.
This article explains feeler gauges sizes and types for each application. Feeler gauges come in sets of 12 to 32 blades and span thicknesses .001″… .040″ (1…40 thou, .025…1.0 mm). Gauges come in carbon steel, stainless steel and brass and may have plain, tapered, angled heads. Machinists can go with a standard .0015″–.040″, 20 to 32 leaf set; engine mechanics should add an angled set to reach valves. Pick carbon steel gauges for shop use and stainless for outdoors/unheated storage (brass is obsolete).
What are feeler gauges?
Feeler gauges are a mechanical instrument for measuring the height of small gaps. The gauges are essentially accurately dimensioned thin pieces of metal sheet (or sometimes wire) cut into leaves or blades and arranged into a set.
Feeler gauges can be used in metalworking, equipment maintenance and instrument adjustment to check gaps and clearances.
Feeler gauge sizes (mm/in)
The standard 32-blade sets run from .0015’’ to .035’’ with .001’’ increments for most of the range.
Standard sequence: .0015″ – .002 – .0025 – .003 – …(+.001)… – .026 – .028 – .030 – .032 – .035″
Other sequences: There are many lower blade count sets, which have either a coarser division or a narrower range. Blade counts and ranges of some of the most commonly available sets are listed below (the table includes metric sets too).
- .0015″ – .035″, 32 blades
- .001″ – .040″, 32 blades
- .0008″ – .040″, 32 blades
- .0015″ – .025″, 22 blades
- .005″ – .020″, 16 blades
- .008″ – .028″, 12 blades
Stacking: You can make intermediate thicknesses by stacking two or more gauges. Stacking also allows you to reach thicknesses above the thickest leaf.
| FEELER GAUGE SETS Min – Max | No. blades | Main div. | Notes |
|---|---|---|---|
| Imperial | |||
| .0015″ – .035″ .0010″ – .040″ .0008″ – .040″ .0080″ – .028″ .0050″ – .020″ .0015″ – .025″ | 32 32 32 12 16 22 | .001″ .001″ .001″ .002″ .001″ .001″ | steel&brass .010” |
| Metric | |||
| .03 – 0.50 mm .04 – 0.88 mm .05 – 1.00 mm .05 – 1.00 mm | 13 32 20 28 | .025 mm .05 mm .05 mm |
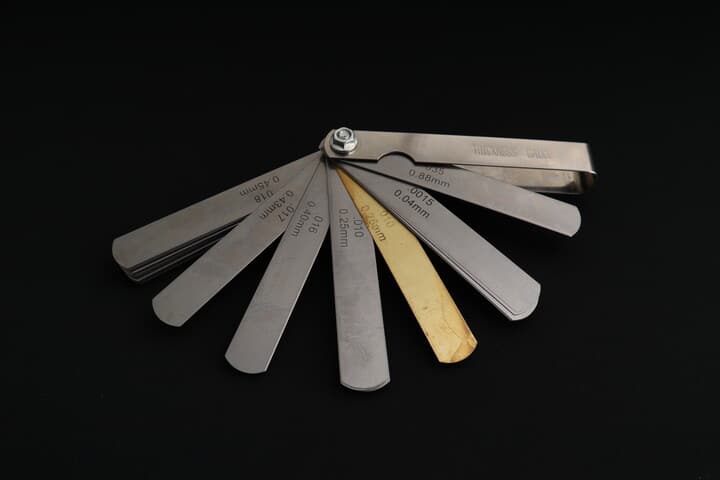
Feeler gauge types
Plain: Straight plain sheet blades; the standard type.
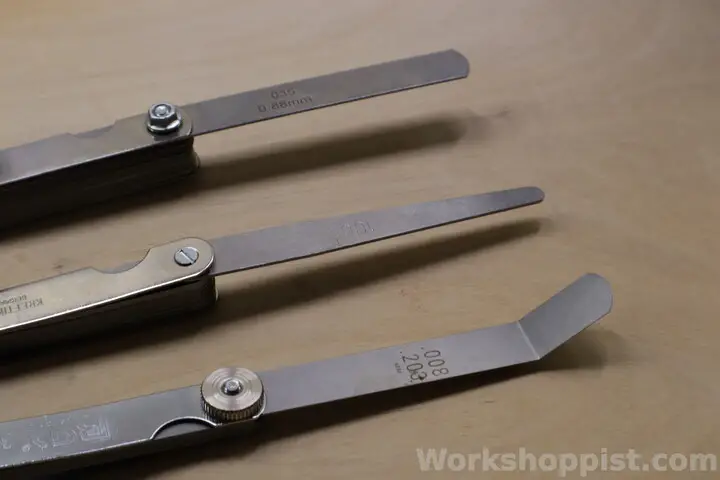
Tapered: Blades narrowing towards tip. Better reach into narrow gaps; good also for general use.
Angled: Blade tips bent 30…45 degrees. For reaching “around the corner”, e.g. into valve seats.
Wire: Bent U-loops of wire as gauge heads. Compact and quick to use, but lower reach and accuracy.
Stainless: Blades out of stainless steel for corrosion resistance. Best choice for outdoor work and unheated (i.e. moist) storage (rust kills carbon steel gauge accuracy fast).
Imperial/Metric: Thicknesses marked in inches vs. millimeters. A matter of taste; gauges with dual markings are most versatile.
Feeler gauge applications
Spark plug: Checking the spark plug gap is a typical feeler gauge application. Thinnest blades are not needed here – a .010″ to .040″ range is enough.
Valve clearance: Angled feeler gauges are perfect for reaching engine valve seats to measure valve clearance.
3D printer: Feeler gauges can be used in 3D printer bed leveling and nozzle height adjustment. Pick a carbon steel thin-leaf set starting from .001″; the standard .0015″ is OK too.
Guitar: Fret and fingerboard clearance, nut slot adjustment. No great accuracy is required; a standard 20-leaf set from .0015″ to .035″ is enough.
Straightness and flatness: With a straight edge, a feeler gauge can be also used for checking the straightness and flatness.
Length reference: Feeler gauges serve as stable low-cost thickness references. You can use them to check the accuracy of your caliper.
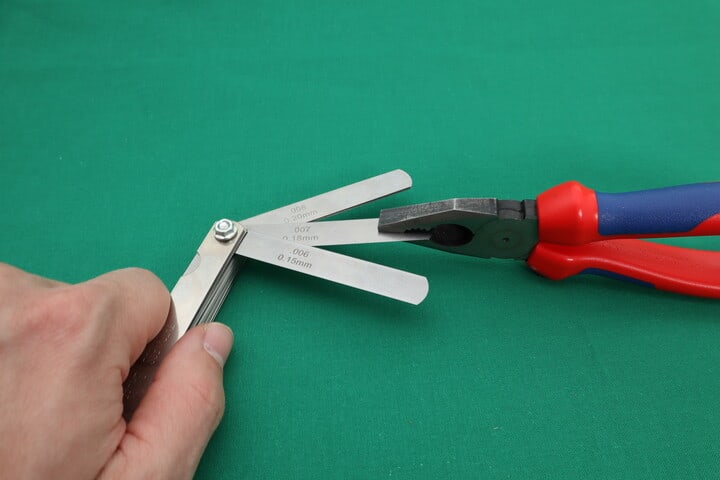
How to use a feeler gauge?
A feeler gauge is used simply by trying if it fits into the gap.
- Gauge goes easy -> the gap is wider than the gauge thickness
- Gauge does not go -> gap is narrower than the gauge thickness
- Gauge just goes -> gap is close to the gauge thickness
NB. Do not force the gauge into the gap. This gives and unreliable reading and may bend the gauge.
In using feeler gauges, you should never have to use but the lightest of efforts. If you try to force a gauge in, you risk bending the gauges or scratching the part surfaces. You also cannot rely on measurement results that were obtained by using force, since the gap faces may actually give in a bit to accommodate a slightly too thick gauge, particularly when working with soft materials.
Profiling: Gap widths are often measured with a feeler gauge not just at a single point, but over some length of gap. This is most efficiently done by inserting the gauge at one point, and then sliding it sideways in the gap over the whole length of interest. If the gauge can traverse the whole length without resistance, you know the whole gap is wider than the gauge thickness.