Chainsaw milling is an interesting sport – and as many others, a sport that’s full of small tricks that will get you to a good result. In this article, I have gathered the most important chainsaw milling tips that I know (16 of them as of now).
This article is not a how-to guide – such guides are specific to a mill type. Rather, the tips here are general principles that apply pretty much regardless of the mill type.
1. Powerful chainsaw
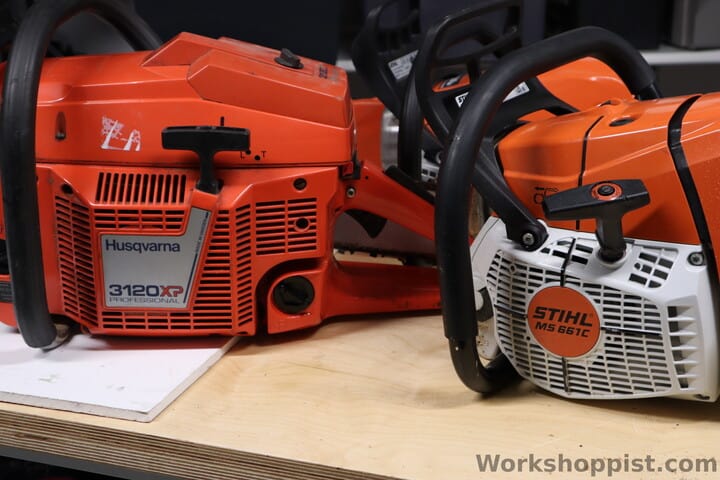
Chainsaw milling is best done with a powerful chainsaw. In fact, I recommend you get the biggest chainsaw you can afford. As a rule of thumb, prefer a saw with a 90cc or bigger engine.
Milling is a heavy-duty application for a chainsaw. A powerful saw not only makes milling easier and more enjoyable, but also makes you less likely to overload and damage your saw.
2. Ripping chain
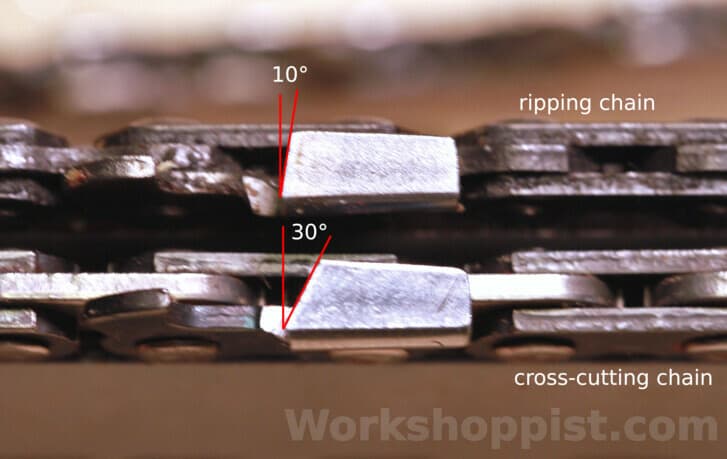
Using a ripping chain instead of the regular (cross-cutting) chain is recommended in chainsaw milling.
A ripping chain has a lower 5…10 degree sharpening angle (regular chains have 25…35 deg.). It may also have skip sequences (i.e. fewer teeth) or narrower scoring cutters.
Thanks to these differences, a ripping chain takes less saw power and leaves a smoother finish on the boards you cut.
For more info on ripping chains, check my earlier article; if you want to DIY a ripping chain, see my instructions on this.
3. Long guide bar
Chainsaw milling usually takes a longer guide bar than your saw shipped with. The reason is that chainsaw milling attachments take space and reduce the effective cutting length of the bar.
An Alaskan Mill, for example, will take around 6″ from your bar (4″ from tip and 2″ from root). This means that while your 18″ bar will cross-cut a 18″ log, it will only mill a 12″ log.
As a rule of thumb, prepare to lose around 5″ from your bar. Practical milling guide bars are 20″ or longer.
4. File rakers
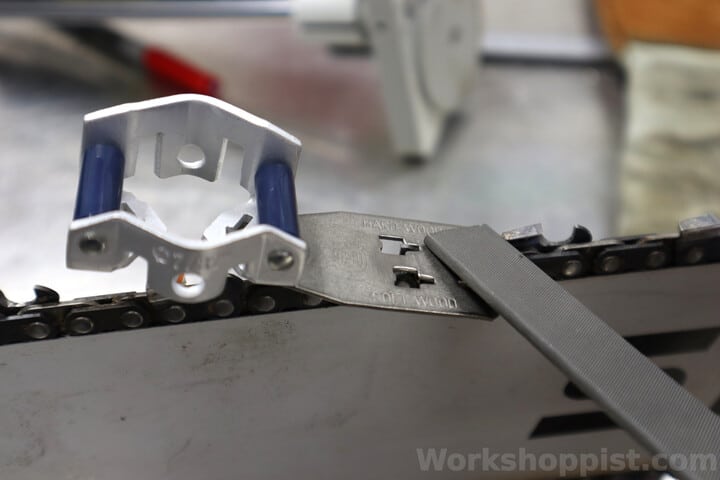
Prepare your chain for milling by resetting the rakers (depth gauges) – these are the “shark fins” in front of each cutter.
The rakers control the depth of cut, and having them too high prevents the cutters from taking a proper bite. Very fine dust and smoke indicate too high rakers (or a dull chain).
The best tools for the job are a flat file and a filing guide. Aim for a .025″ or .032″ depth setting. As a rule, reset rakers after each regrind and every five manual sharpenings.
5. Max bar oil

Milling consumes a lot of bar oil; to prevent running the chain dry, set the chain oil pump of your saw to the maximum flowrate.
The oil pump is usually adjusted by turning a screw in a recess in the bottom or side of your saw. Turn the oil setting to the maximum and do not hesitate to use the “overdrive” sector found in some Stihl saws.
Auxiliary oiler: Consider getting an auxiliary chain oiler for logs thicker than 25″. With such thick logs, the built-in oiler of the saw usually cannot keep the chain well-oiled.
Auxiliary oilers sit at the outboard end of the milling rig and feed oil into the bar tip. Aux oilers are available from Granberg (G801A), Norwood and Farmertec, and are also easy to DIY.
6. 40:1 or 32:1 fuel
Consider using a thicker 40:1 or 32:1 fuel–oil mix ratio in chainsaw milling instead of the standard 50:1.
A thicker mix helps to reduce the risk of engine damage under the heavy milling load. This is particularly important with under-powered saws and in hot conditions.
The downside of thicker 40:1 or 32:1 mix ratios is increased smoking and engine fouling. These are less serious than engine seizure and can be countered with regular maintenance.
For more info, see my article on fuel mix ratios; my mix ratio calculator will help you in preparing the mixture.
Consider alkylate: Using an extra-pure type of gasoline called alkylate fuel may be worth it in milling. This gasoline burns cleaner and has little to no aromatics, reducing the toxic fumes and smell in exhaust to a minimum. This is a big advantage in milling since you will be subjected to the saw exhaust possibly for hours.
7. Debark sandy logs
If your logs have been in contact with sandy ground, it is recommended to debark them before milling. Any sand in the cut will dull your chain many times faster than otherwise.
8. Mill downhill
If possible, orient your milling downhill to take advantage of gravity. Chainsaw milling requires a steady forward push which can get hard on your hands. Having the cut go downhill makes gravity to do a part of the work for you!
You can arrange a downhill for your log in two ways. If the log lies on sloping ground, turn it to point downhill and start the cuts from the top. If you saw on sawhorses or are able to lift the log, have one end supported higher than the other.
NB. Before you start milling, make sure the log cannot slide, roll or fall. You can really get badly hurt if there is any log movement during the cut.
9. Mill downwind
Milling is best with the wind on your back.
This is not to help you push – rather, the reason is that a “tailwind” will carry the saw exhaust fumes away from the mill operator. A left-hand wind is also fine, but right-hand wind, head wind or no wind are the worst.
10. Heavy earmuffs
Use high noise reduction earmuffs (30 dB) when milling.
You are going to be next to a very loud chainsaw potentially for hours, so having efficient hearing protection is recommended. The more standard 24 dB are OK, but opt for better is available.
11. Respirator
Consider using a respirator to protect yourself from saw dust while milling.
Unless wind conditions are very favorable, you will be subjected to saw dust for a long time when you operate a chainsaw mill. Even a simple respirator mask will cut the exposure to a minimum.
For best protection and use comfort, choose a powered respirator mask (e.g. 3M Versaflo, Scott Duraflow) with combination filters (particle & carbon). These will stop both saw dust and harmful particles and compounds in the saw exhaust from reaching your lungs, without making breathing any more difficult.
12. Secure nuts & bolts
Check all nuts and screws for tightness before you start the saw.
The saw engine will cause the whole milling attachment to vibrate for the entire milling duration. The vibration may undo loose connections which may change the chain tension, cutting depth setting or even cause the saw to slip from the mill.
Check the connections in this order:
- Bar nuts (check chain tension first)
- Bar clamps
- End brackets and depth setting
- Handles
Proper tightening torque is usually enough to prevent loosening. If some connectors are problematic, use a thread-locking compound (Loctite) or locking washers (Nord-Lock or similar wedge-lock are the best).
13. Use wedges
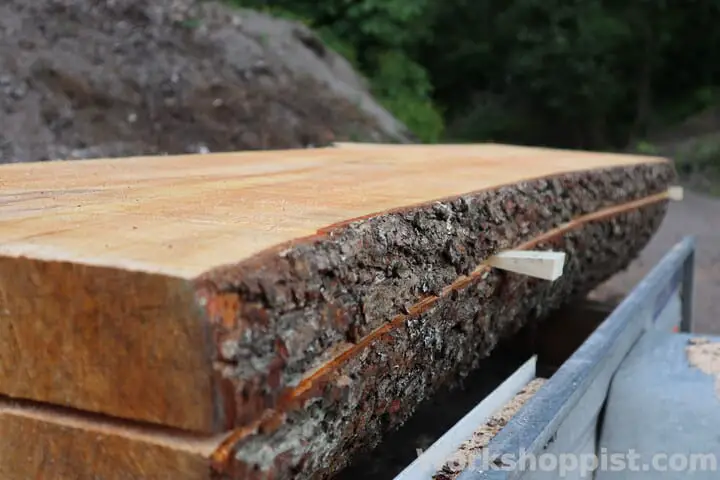
During cutting, stop every 8 feet (2 m) or so and push wedge pieces into the cut from both sides. These wedges support the free cut slab and prevent it from pinching the guide bar.
Wedges are easy to make yourself from wood. Make the wedges thin and sharp – steep ones tend to slide out of the cut in the vibration.
14. Medium RPM
Aim for steady medium RPMs when milling – avoid high revolutions. This saves your saw and reduces the likelyhood of engine issues.
Keeping the RPM constant may take some practice: a steady light push and almost full throttle usually work the best. You may have to let the throttle wide open with small saws, but try to keep the revolutions down.
15. No seesaw
During cutting, apply a steady forward push and avoid seesaw, or wiggling the milling rig. Seesawing makes the cut surface rougher than necessary by introducing oblique recut marks.
Seesawing does actually help the saw and chain by reducing the effective cutting length. Some seesaw may be necessary with an under-powered saw or a very wide slab.
You can avoid having to seesaw by using a powerful saw, a sharp ripping chain, and with very wide logs a helper handle at the bar tip.
16. Sharpen chain
When chainsaw milling, stop often to sharpen the chain. A chain sharpener is an essential accessory – you will need it on site as you work.
Some sharpen the chain every 2 to 3 cuts, some between tanks. With sandy or dry logs, prefer the former.
Fine dust, smoke and smell of burning are signs of a dull chain; avoid letting your chain to get there!