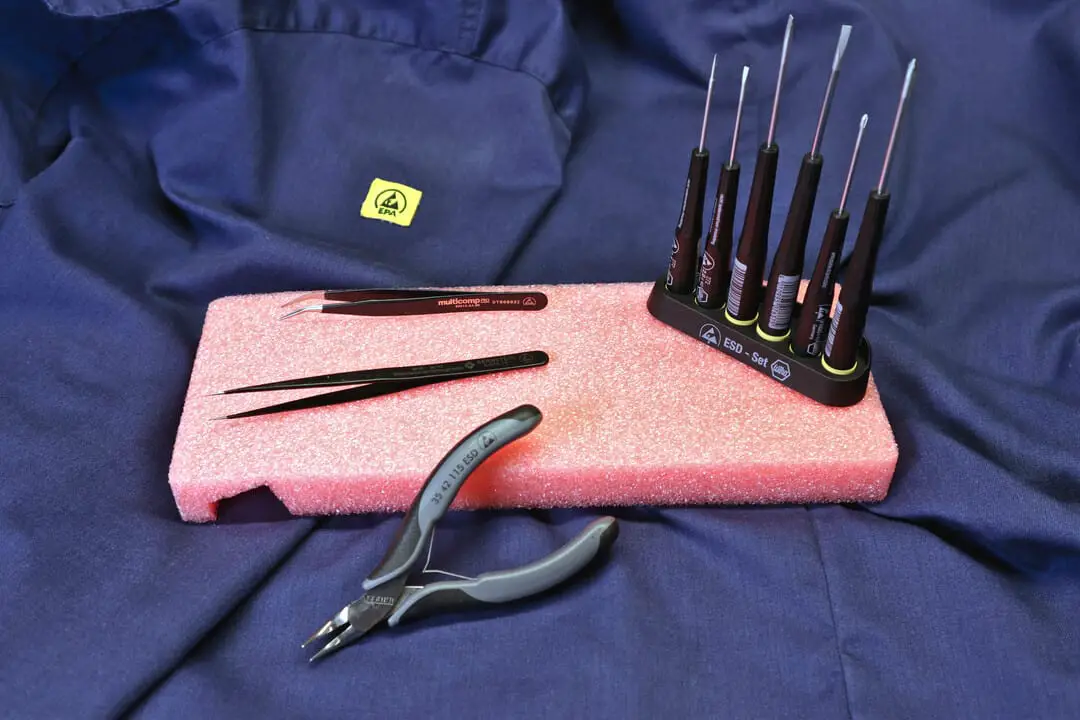
Electrostatic discharge (ESD) may be a minor nuisance in everyday life, but in working with sensitive electronics, it is a veritable hazard. One of the many methods of combating the destructive effects of ESD at electronics workstations or assembly lines is the use of ESD or “anti-static” hand tools. Being practically identical in appearance and function with the regular, non-ESD versions, ESD tools present a very attractive hassle-free way of lowering the risk of component damage due to static electricity.
There is, however, much mystery surrounding everything related to ESD, and the topic of ESD tools is no different. You might have wondered how, exactly, are ESD tools different from regular, non-ESD tools? What does it mean that they are dissipative? When should you use them, and do they replace other methods of ESD protection?
In this article, I am going answer these questions and tell you all you need to know about ESD tools. In short, ESD or anti-static tools are special versions of regular hand tools that lower the risk of destructive electrostatic discharge by providing a slow discharge path. ESD tools are complementary to other methods of ESD protection and are recommended for work with all electronic components and devices.
Next, we are going to explain how ESD tools provide the discharge path, what kind of ESD tools there are, and how they compare to other means of ESD protection. If you are thinking whether you need ESD tools, this article should help you decide!
What are ESD tools?
Simply put, ESD tools are special versions of regular hand tools, such as tweezers or pliers, that lower the risk of hazardous electrostatic discharge from the user’s hand into whatever the user is working on. They are intended for work with sensitive electronic components and devices that may be damaged by static electricity.
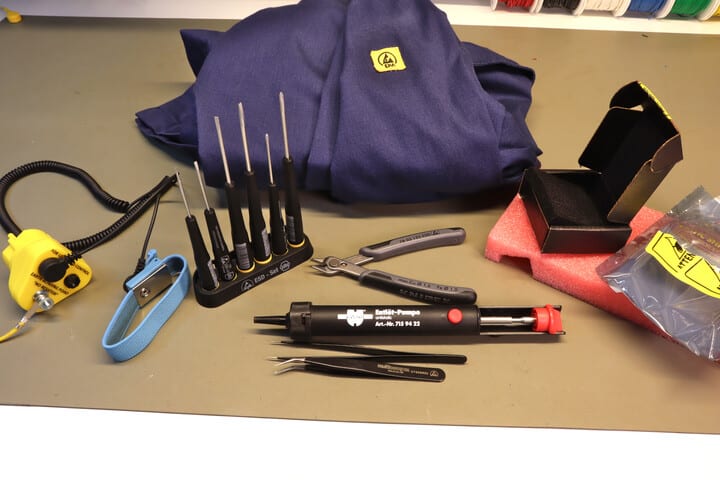
ESD versions are usually available for tools that you are likely to use in electronics work. The most important of these are:
- pliers of many types
- tweezers
- screwdrivers
You may also find ESD models for some measurement tools and special tools like desoldering pumps.
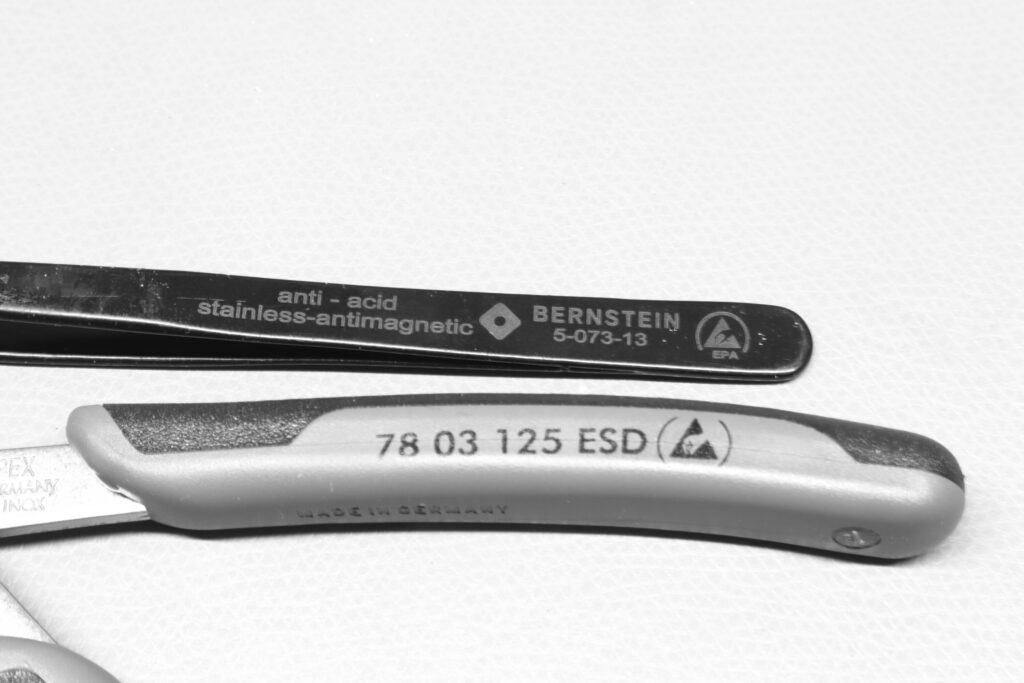
ESD tools can be identified by standard markings that should be printed visibly on the tool body, as illustrated in the photo below.
How do ESD tools work?
Most ESD tools work by providing a slow conduction path from the user’s hand to the workpiece through the tool. This slow conduction is achieved by separating the user’s hand from the metal body of the tool by an insulating layer that is weakly conductive. This weakly conductive layer is often called dissipative, and may be applied on the tool as plastic or rubber handles or a coat of paint.
To see why a layer that is neither a good insulator nor a good conductor, but weakly conductive, is just what is needed, consider the following.
Imagine you are returning from lunch to your electronics workstation to resume work on a test circuit. Now, it just so happens that you have loaded yourself up to a high electric potential during the lunch break, perhaps by pulling off a sweater, sliding your hand on a plastic rail or petting a cat. As you are about to pick up a sensitive component from the table with your tweezers, let us examine three scenarios:
Case 1: tool conductive
If your tweezers are of the traditional bare stainless steel type and good conductors throughout, they will act like a lightning rod. They provide an excellent conduction path for the charge stored in you, effectively shorting you to the component and anything coupled to it. This is the worst possible case: your charge will be released into the component in a matter of microseconds at high currents and peak power and is sure to destroy the component if it is sensitive.
Case 2: tool insulated
If your tweezers are well insulated, on the other hand, with thick plastic coating, nothing happens: you pick up the component and place it onto the circuit board, likely without any transfer of charge and no damage done. Excellent, right?
Before sounding the all clear, however, remember that you remain charged. The insulated tool did protect this component during this operation, but did nothing to remove the hazard: the next component you grab with bare hands or pair of pliers will get the full voltage.
Case 3: tool weakly conductive
If the pair of tweezers is conductive, but only very weakly, something quite different happens. As you grab the component, the tweezers will start discharging you into the component. But this time, the current will very low due to the high resistance the tweezers present. This low current produces only little power and heat, and is not very likely to damage even sensitive components. However, it is often enough to discharge the hazardous electrostatic voltage stored in you within a typical contact duration and thereby neutralize the danger this charge posed to the next component in the following operation.
This weak conduction or dissipation is exactly what ESD tools do: they prevent rapid electrostatic discharges that may damage components, but allow slow and safe electrostatic discharge. You can think of an ESD tool as a high-valued pulldown resistor for yourself.
How conductive are ESD tools?
So how much conductivity do the ESD tool have exactly? What counts as weakly conductive or dissipative?
The answer depends a bit on the tool model, but in general the weakly conductive parts in ESD tools have a surface resistivity between 1 MOhm and 1 GOhm. These values have been found to keep the discharging current down at safe levels, but also allow for sufficiently quick discharge time. Materials with resistivity in this range are called dissipative in ESD terminology.
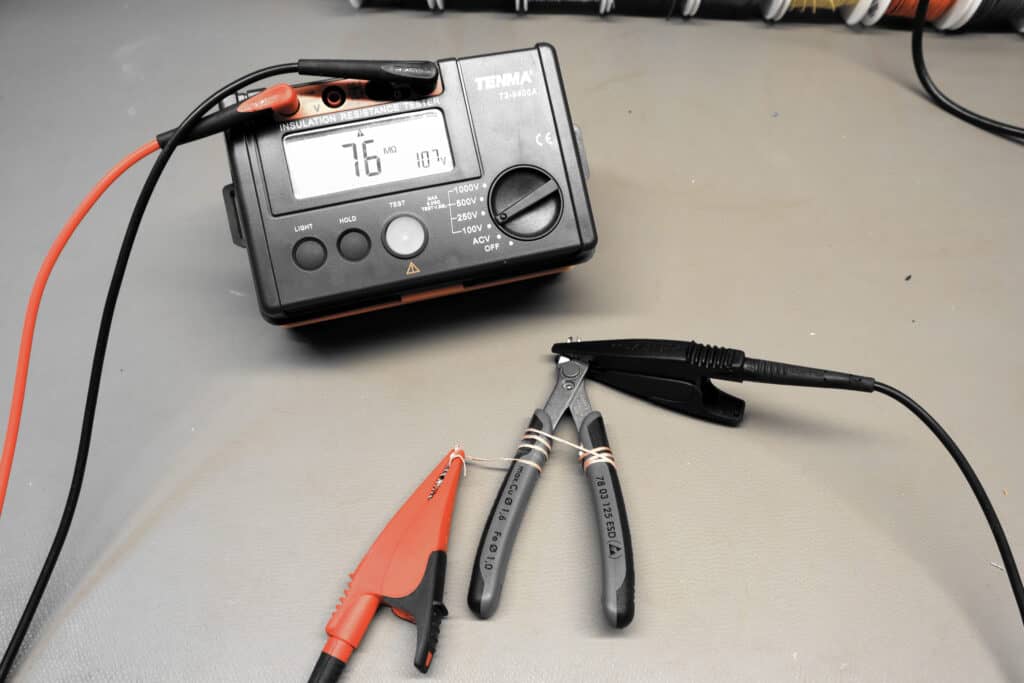
Although specified in Ohms, you should note that the surface resistivity is not the same as resistance. The actual resistance that the dissipative handle or coating of an ESD tool present between your hand and the tool tip depends on how you grip the tool. However, in most cases this resistance, in Ohms, will be of the same order of magnitude than the surface resistivity in Ohms. This is illustrated in the photo below, where the resistance of a pair of ESD pliers is measured using a insulation resistance tester.
How to use ESD tools?
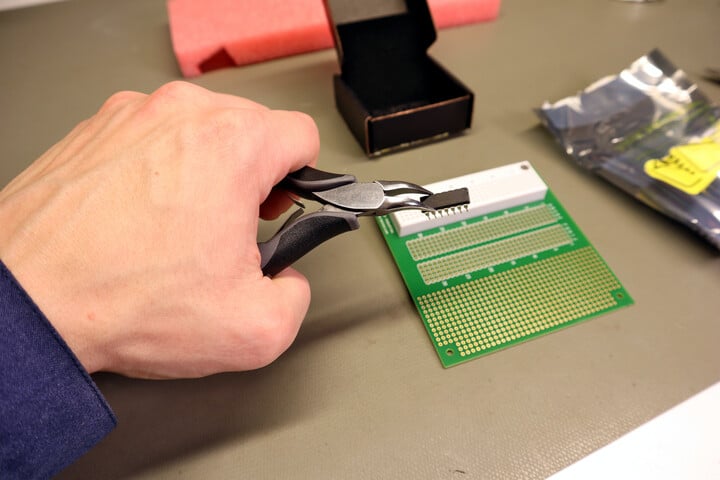
ESD tools are very simple to use: basically, you use an ESD version of a pair of pliers exactly as you use the regular, non-ESD version. No special techniques are required, and there are no levers to flip or buttons to push or the like. As a user, you do not have to worry about what is going on in the tool.
However, there is one caveat to this: you should always grip an ESD tool by the handles or coated areas, and remember to keep your fingers away off the bare metal tips. Resting even one finger on the exposed metal shortcuts the dissipative handles and nullifies any use you might get from using the ESD version in the first place.
ESD tools and other ESD protection methods?
Apart from ESD hand tools, there are many other means of ESD protection available. These range from the common wristband through ESD desk mats, floor mats, clothing and footwear, all the way to ESD workstation furniture. This wide selection may leave you wondering how many of these should you implement, how they work together, and which form is the best.
The truth is that the different forms of ESD protection are complementary and additive, and any number of them can be implemented at a work station or assembly line. Employing a single form of ESD protection, such as a wrist band or an ESD-protected tool, works and reduces risk of damaging ESD, but does not remove it completely. Adding an ESD mat or anti-static shoes for the personnel eliminates more of the hazard scenarios and helps to reduce the risk further.
ESD tools are advantageous in being affordable and requiring no effort on the part of the user to be effective. The added cost of ESD versions of common hand tools is typically only between $5 and $20, which is less than the cost of all other methods apart from wrist bands. The added cost of an entire ESD tool is at around $100, which puts into the same cost bracket with ESD clothing, footwear and large table mats.
There are still some disadvantages to ESD tools. For the first, if you grab an ESD tool improperly so that you hand touches the bare metal parts, the tool offers no protection what so ever. Second, unlike other ESD measures, ESD tools do not help you in bare hand operations, such as manipulating components and circuit boards by hand.
When should you use ESD tools?
ESD tools are recommended whenever you are working on sensitive electronic devices or components. Strictly taken, this includes almost all electronic devices and the vast majority of electronics components. Typical applications include assembling or servicing electronic devices like computers, mobile phones or other consumer electronics as well as assembling individual circuits.
While always recommended, the use of ESD tools is most important in handling certain electronics components that are particularly sensitive to ESD. These include
- field-effect transistors (FETs)
- CMOS integrated circuits
- laser diodes
- thin film resistors
as well as small circuits that include these components. These components are most vulnerable to ESD when handled individually; after installation into larger circuits or devices, the circuit layout often protects the individual sensitive components to some extent.
As mentioned earlier, ESD tools are only one of many complementary methods of ESD protection. This means that ESD tools alone are not enough for most purposes.
Conclusion
In this article, we learned that ESD tools work by controlled slow conduction, and why this is what you would want when handling sensitive electronics. We also looked at how ESD tools relate to other means of electrostatic protection, and when should you be using them.
The practical take-away of the discussion is that ESD tools are a great way of improving electrostatic safety at only a moderate additional cost. Perhaps the biggest selling point of ESD tools is that, unlike most other electrostatic discharge protection, ESD tools require zero added user effort: many component damages could be avoided just by swapping out your regular, non-ESD pliers and tweezers for ESD versions of the tools, which are just as easy to use.
Still, ESD tools are not a cure-all solution to the broad range of ESD hazards. They are better viewed as an efficient building block of electrostatic safety, and best used in combination with other ESD protection such as ESD mats, wristbands and clothing.